

This winter I was ski touring with some friends when the conversation of Raggeds product line came up. One of these friends told me they couldn't tolerate synthetic sun hoodies, the fabric irritated their skin. They suggested we should make some Merino Items, especially a hoody-style piece. That conversation stuck with me.
About a month later, we were brainstorming product ideas in a team meeting when one of our longtime employees ran to his office and pulled out a Merino Hoody. It was well loved and still going strong. Turns out we used to make one. We ran out of fabric and merino is expensive - so we didn’t reorder. The hoody got shelved and eventually forgotten about.
Sitting in that meeting looking at that old hoody, we decided to bring Merino Wool back to Ragged.
Making a Merino hoody sounds like it would be simple, right? “Let’s use one of our existing hoodie style patterns, get some high-quality Merino and slap them together. Boom, Merino hoody.” Turns out it isn’t that easy.
We went through three major samples over several months. The fit was off. The cuffs stretched out. We even had to source a specialty needle — standard needles put holes right through fabric this fine.
Here’s how the process went:
Sample 01:
Sewn from our sun hoody pattern. It was a starting point — but it quickly showed us what needed fixing.
► Fit came out too baggy
► Cuffs stretched out with wear
► Flatlock needles punched holes through the fabric
 Initial Pattern |
 Testing Sample 01 - too baggy |
Sample 02:
Two of the three problems tackled with this sample.
✅ Pattern Modified - Ease of the pattern was reduced which provided a better fit
✅ Specialty needles sourced - no more holes in the fabric
► Cuffs still stretching out - not solved yet
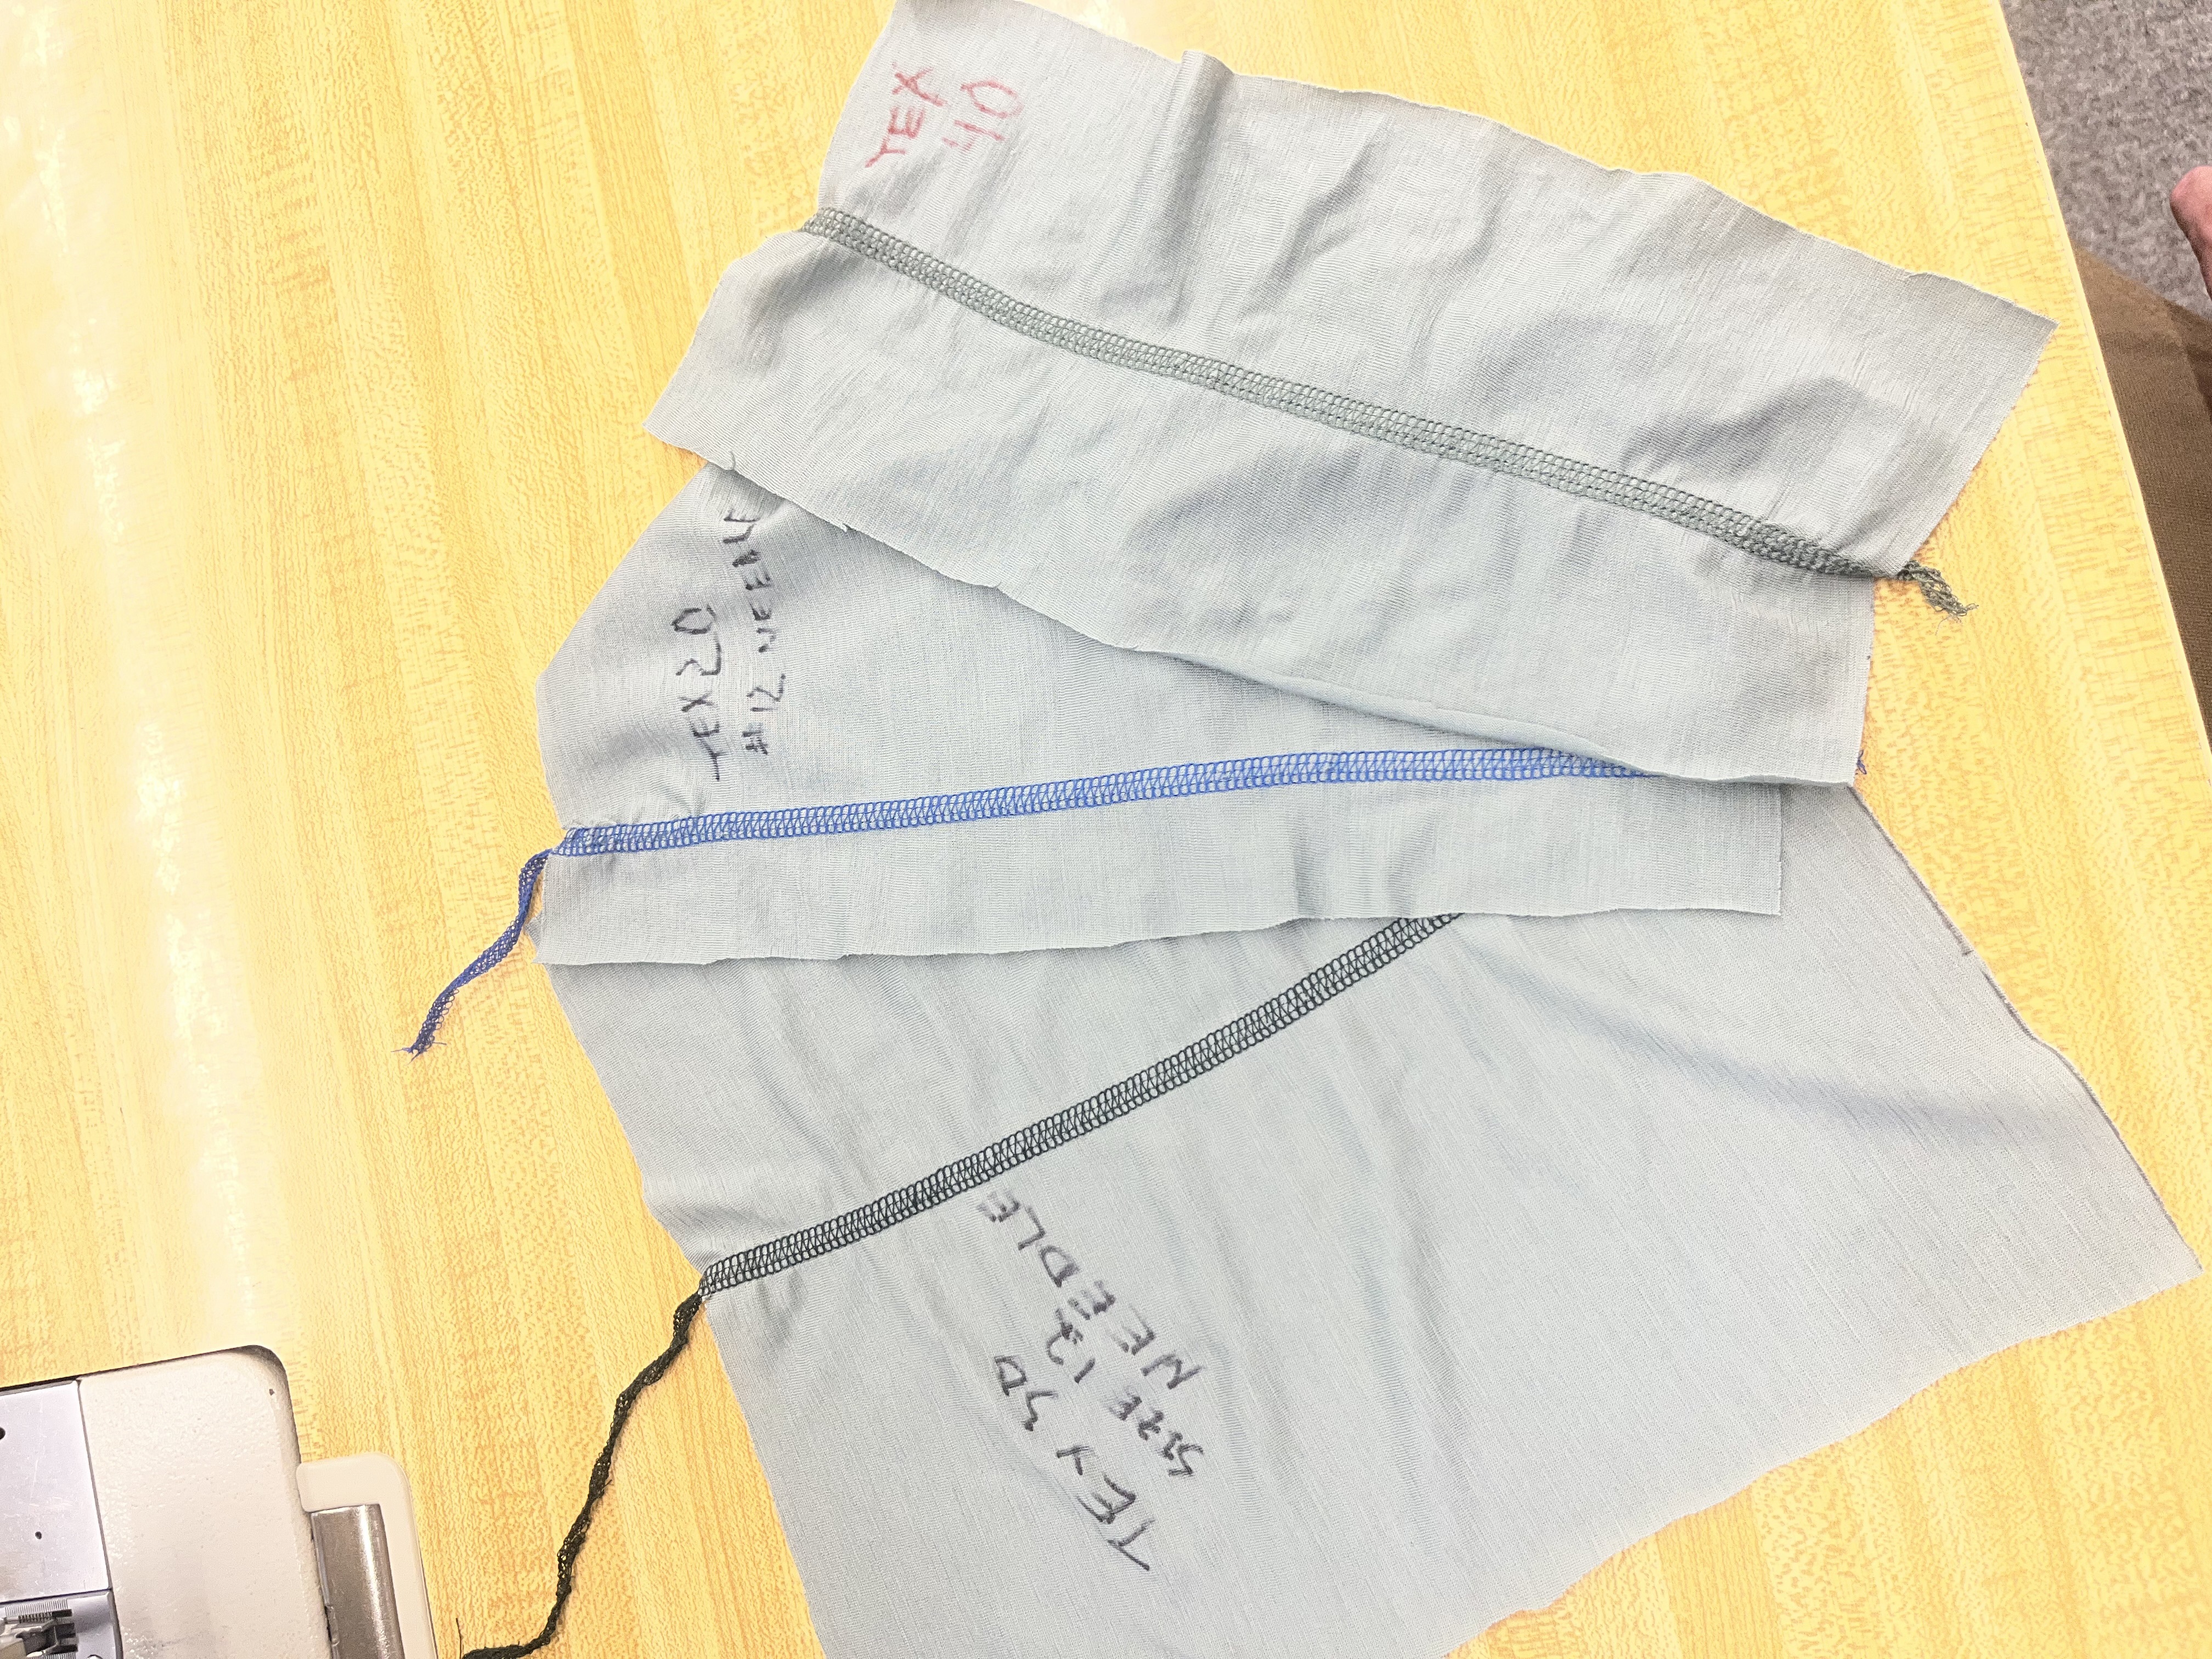 Needle / thread testing |
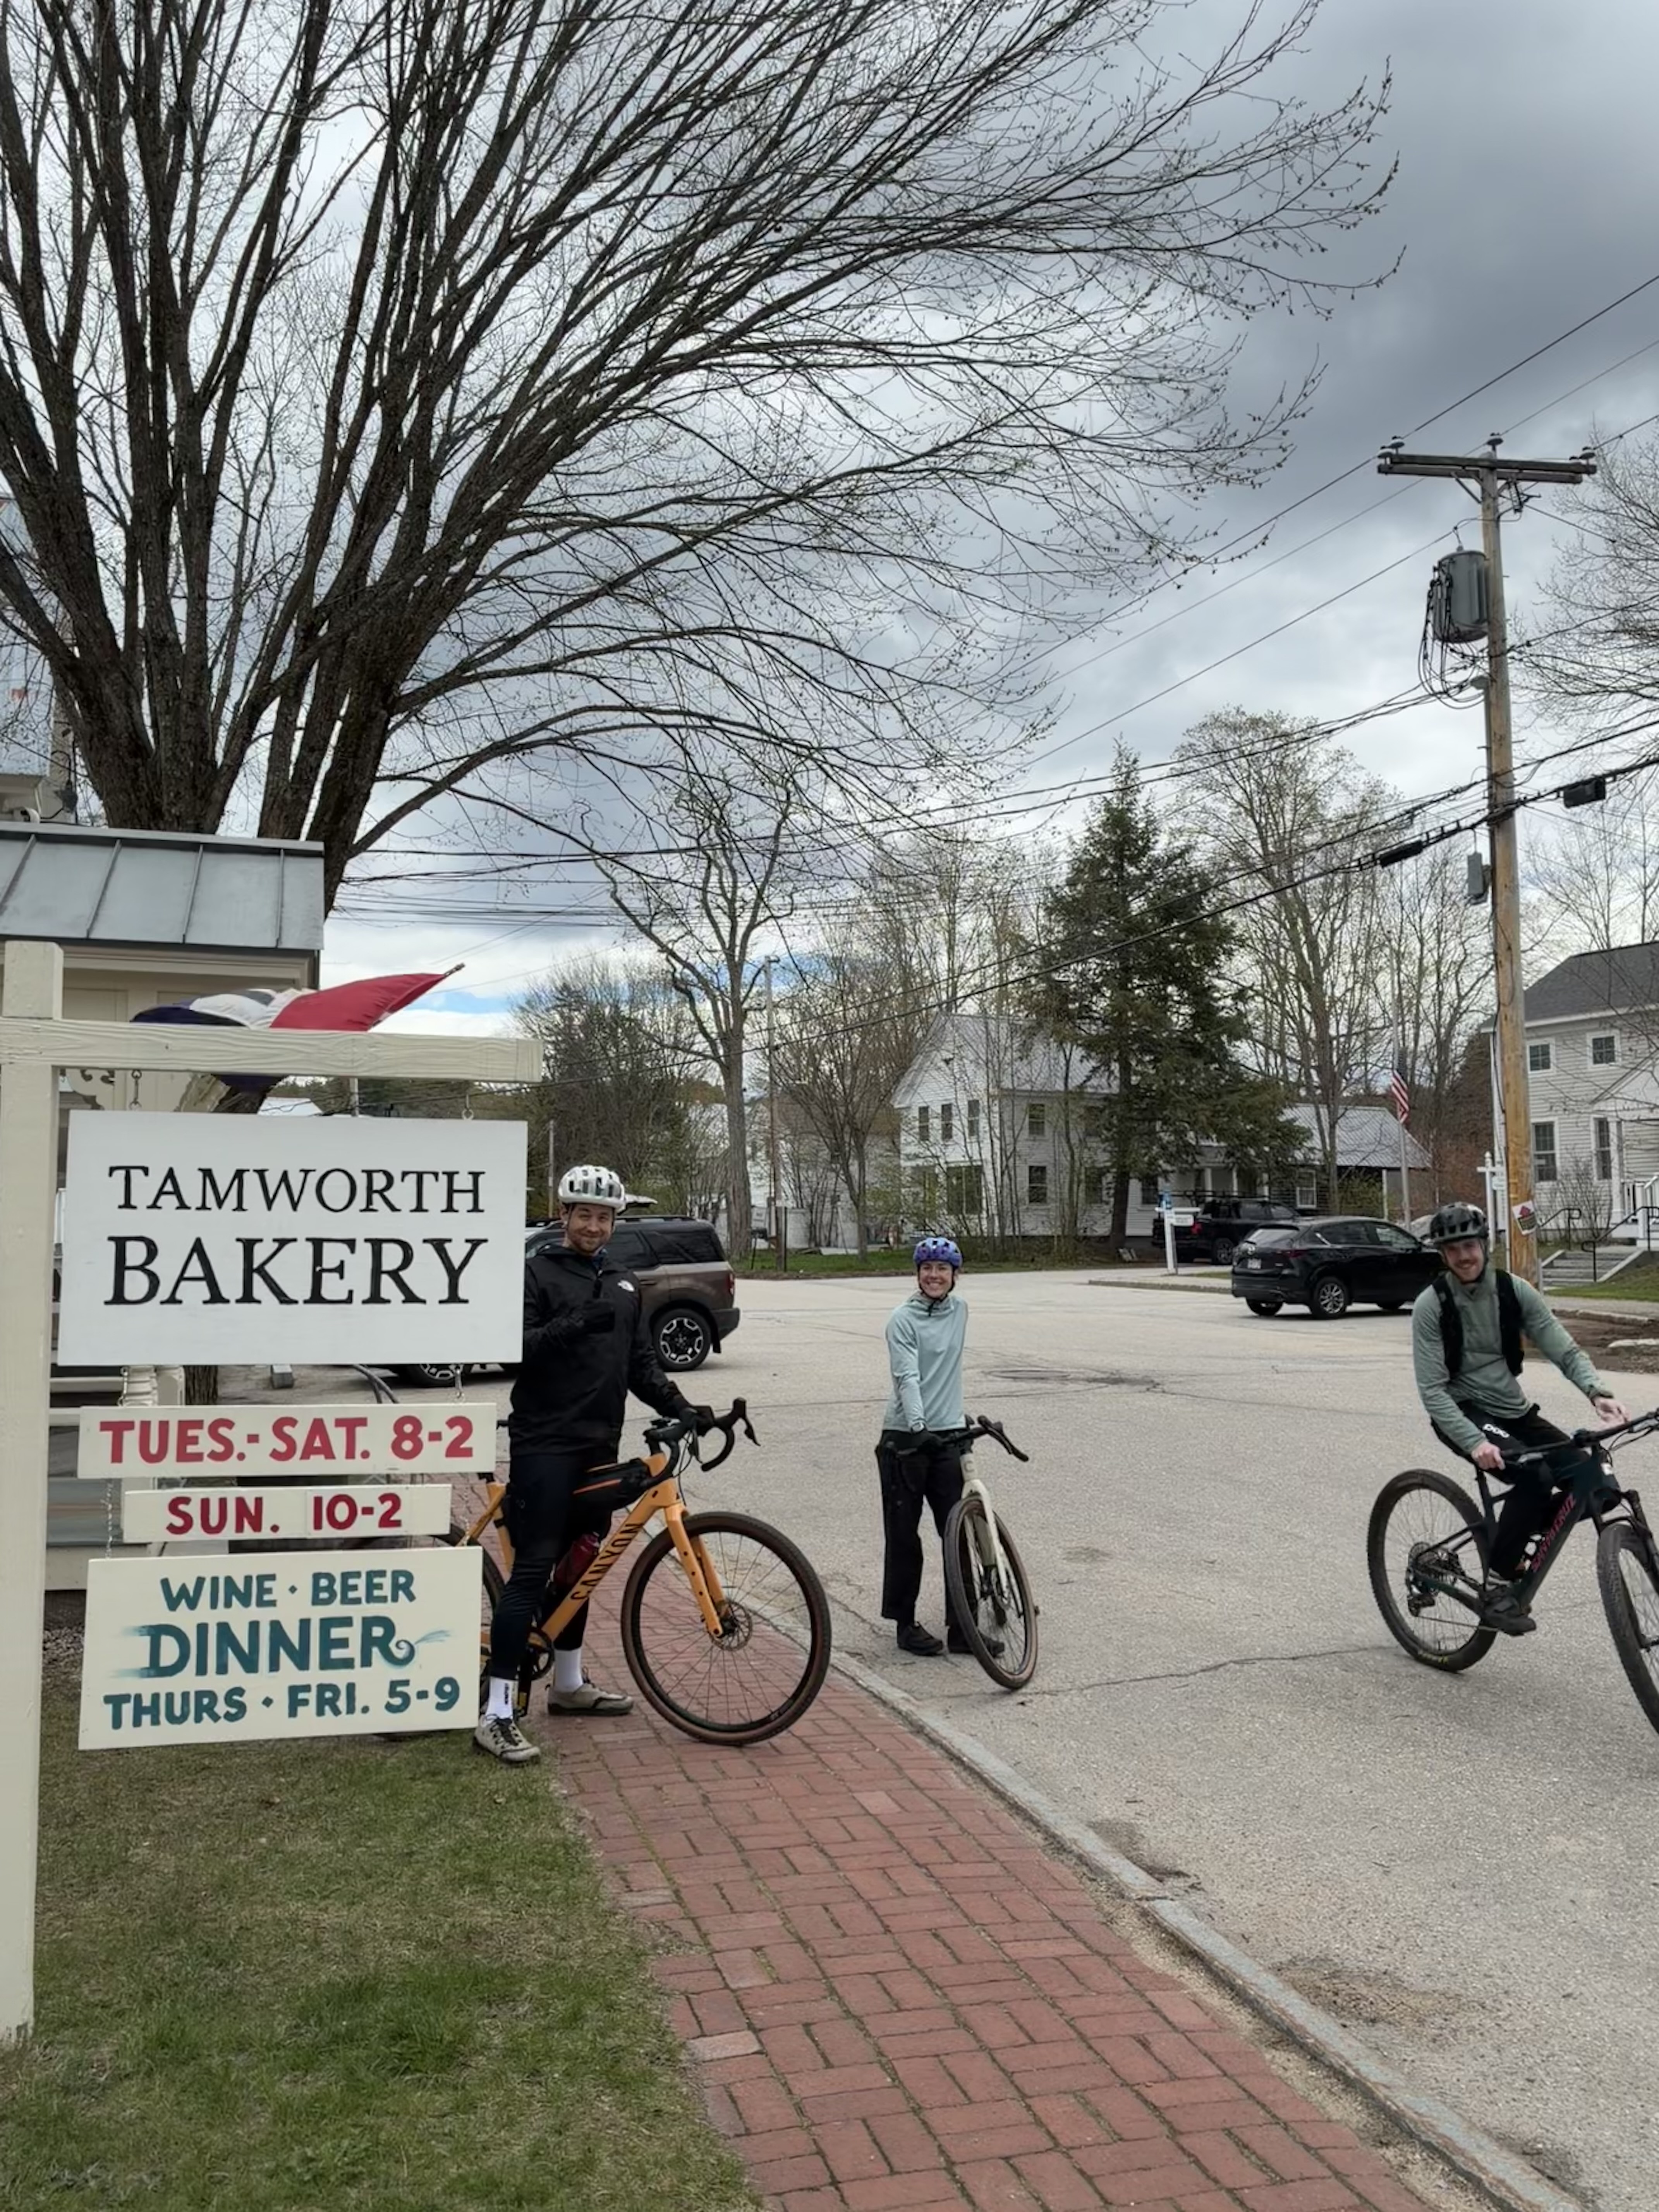
 Testing out the updated fit on Black Cap - good to go. |
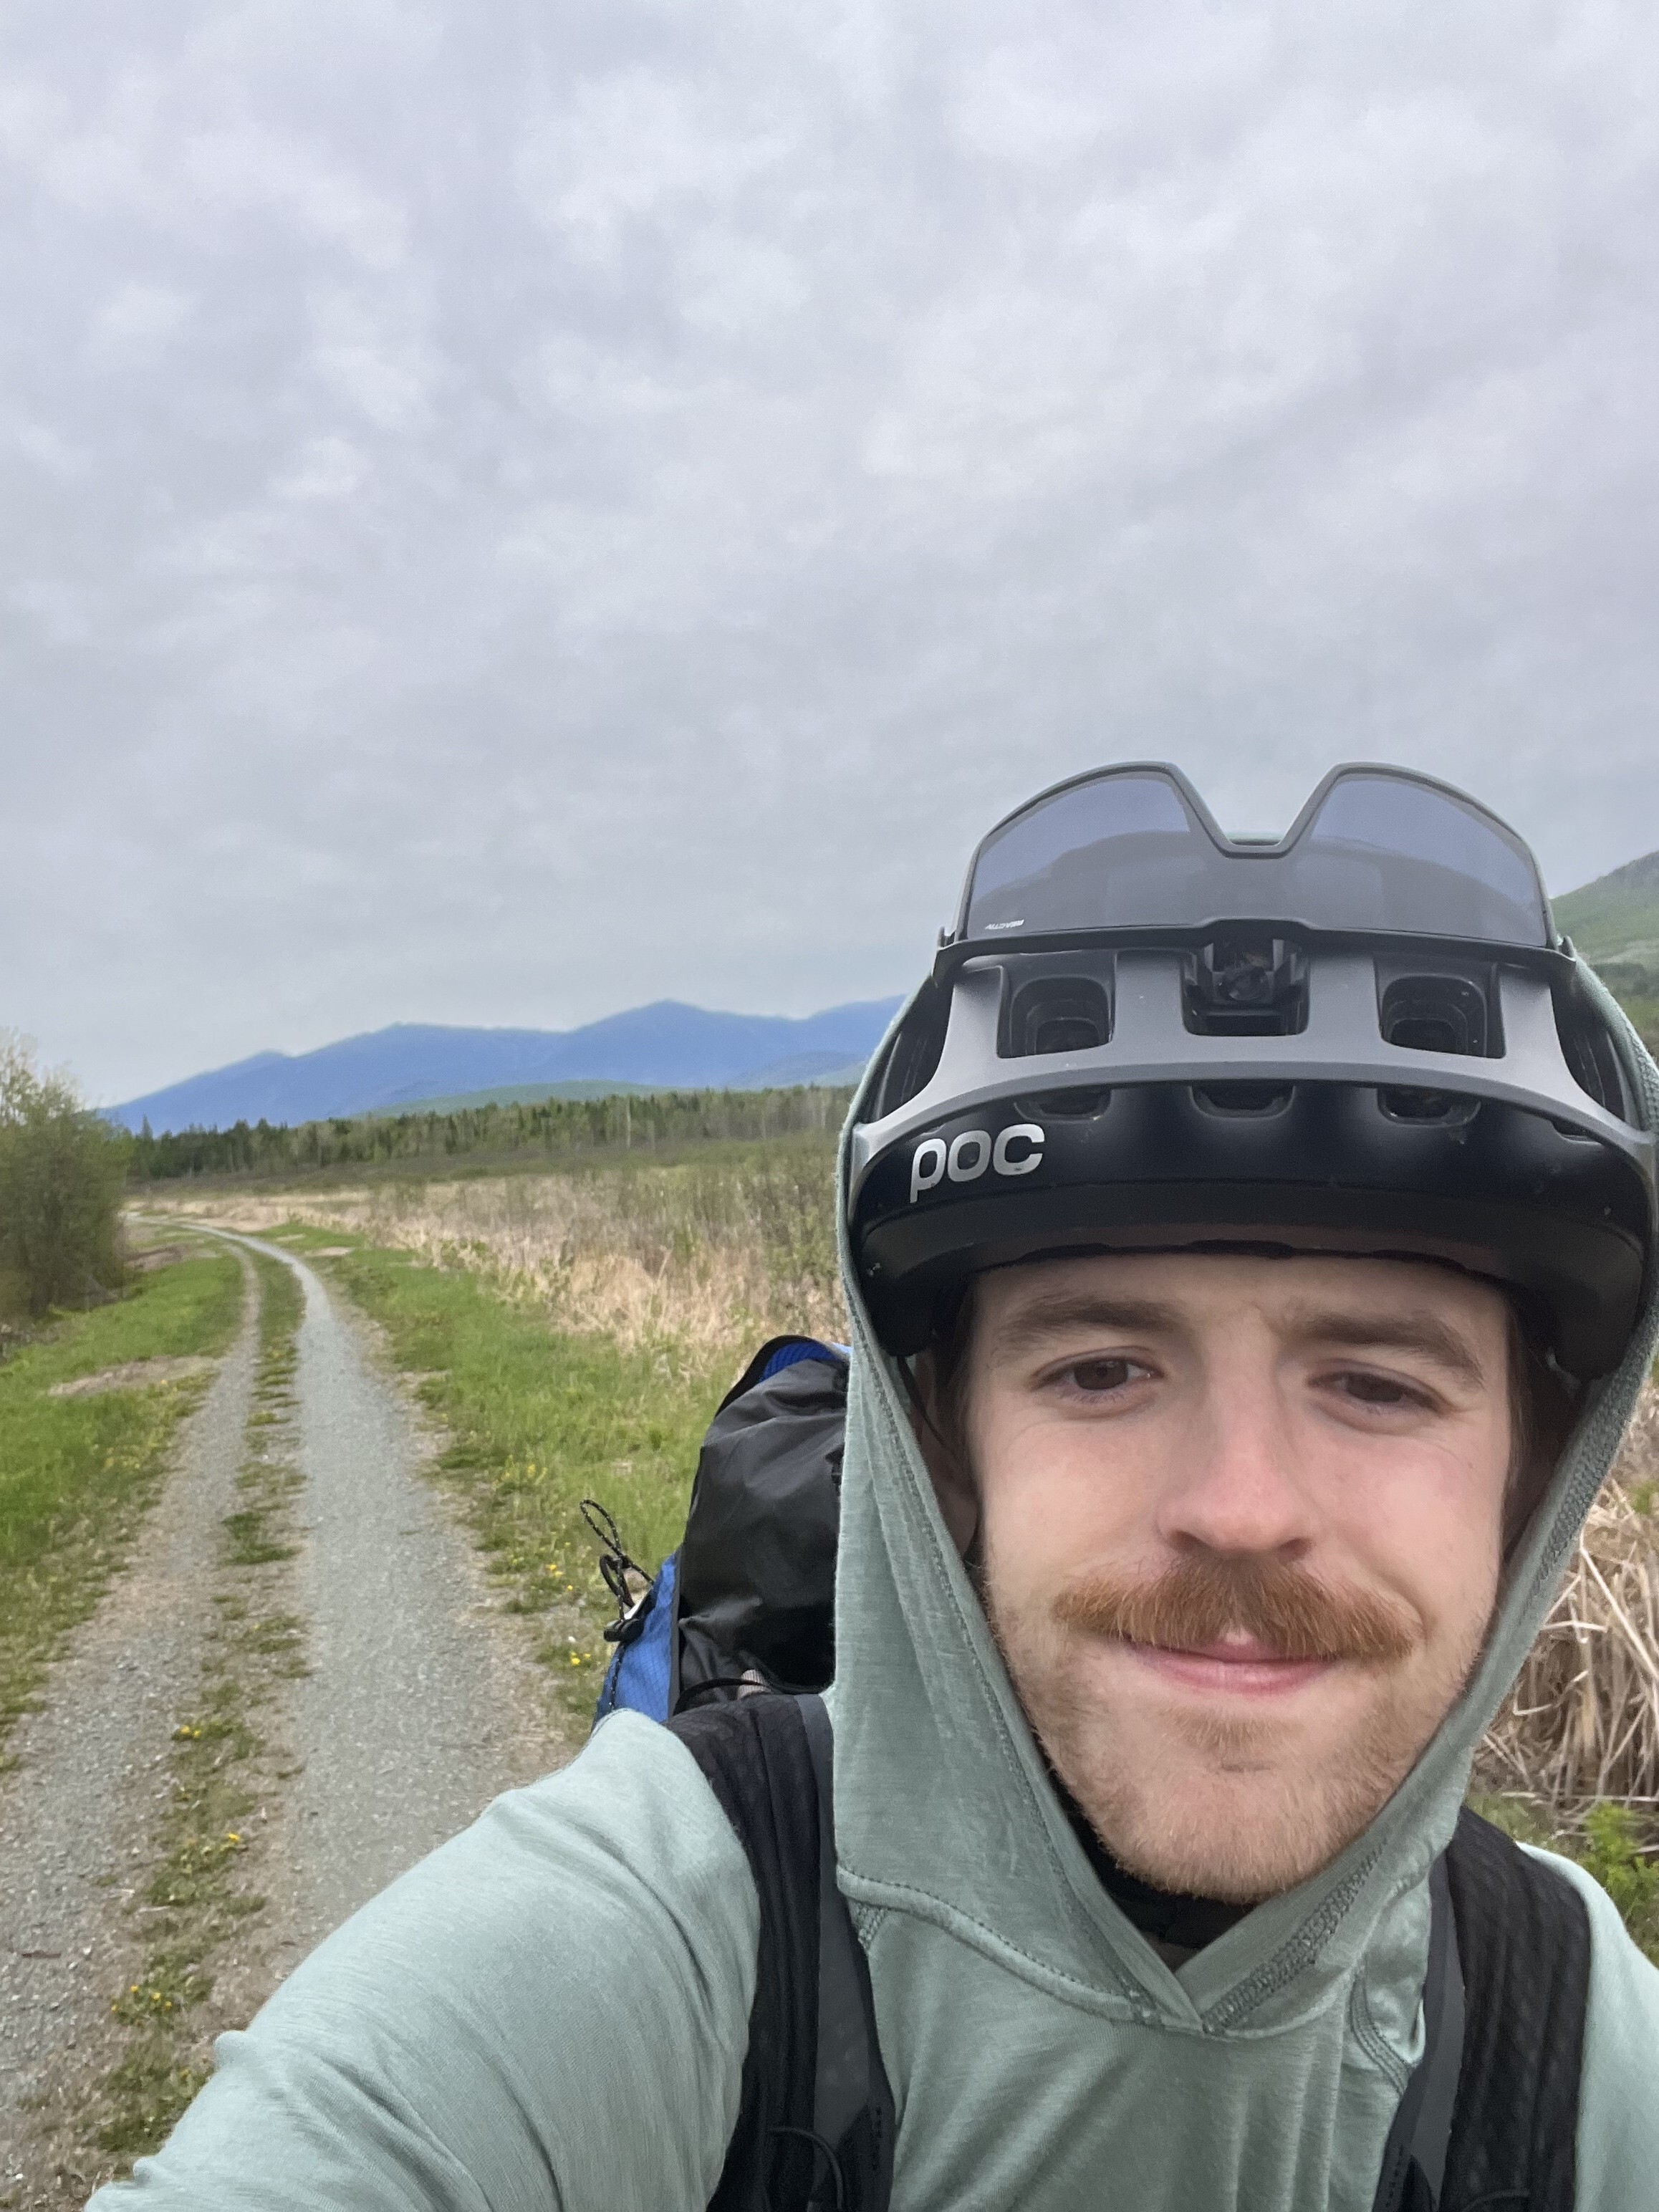
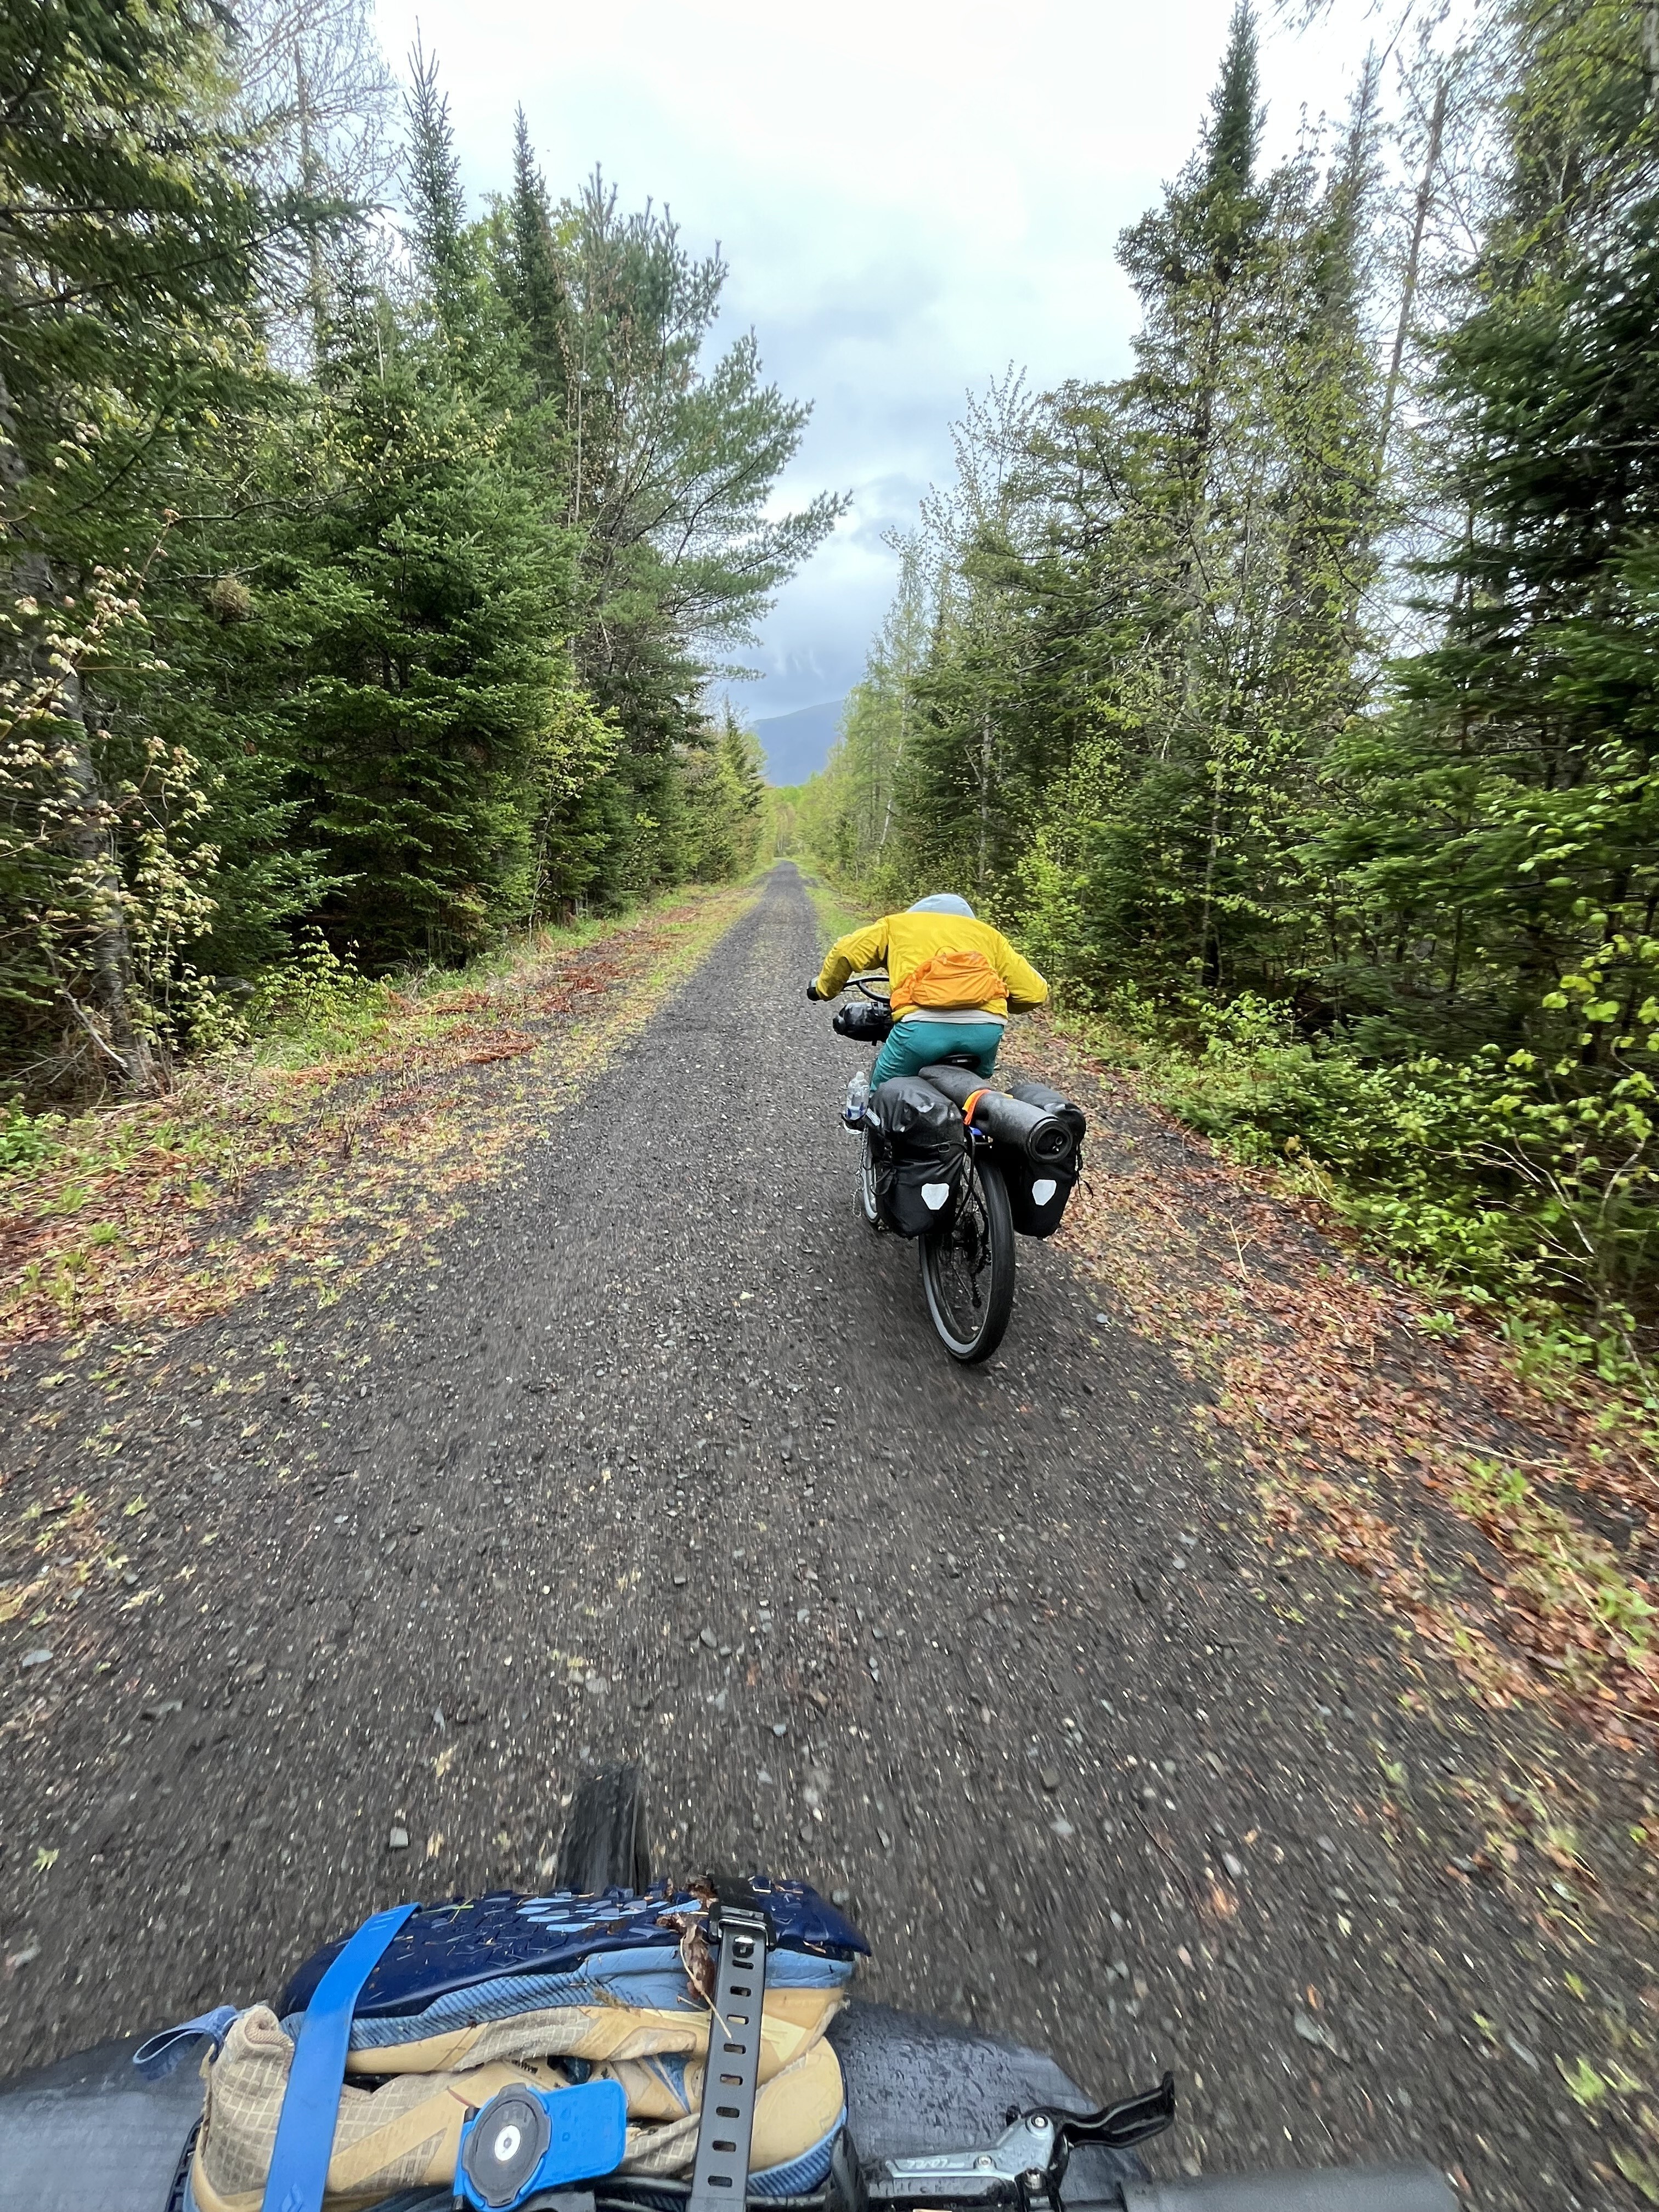
Field Test Highlight:
Two days bikepacking. One bluebird, one rainy.
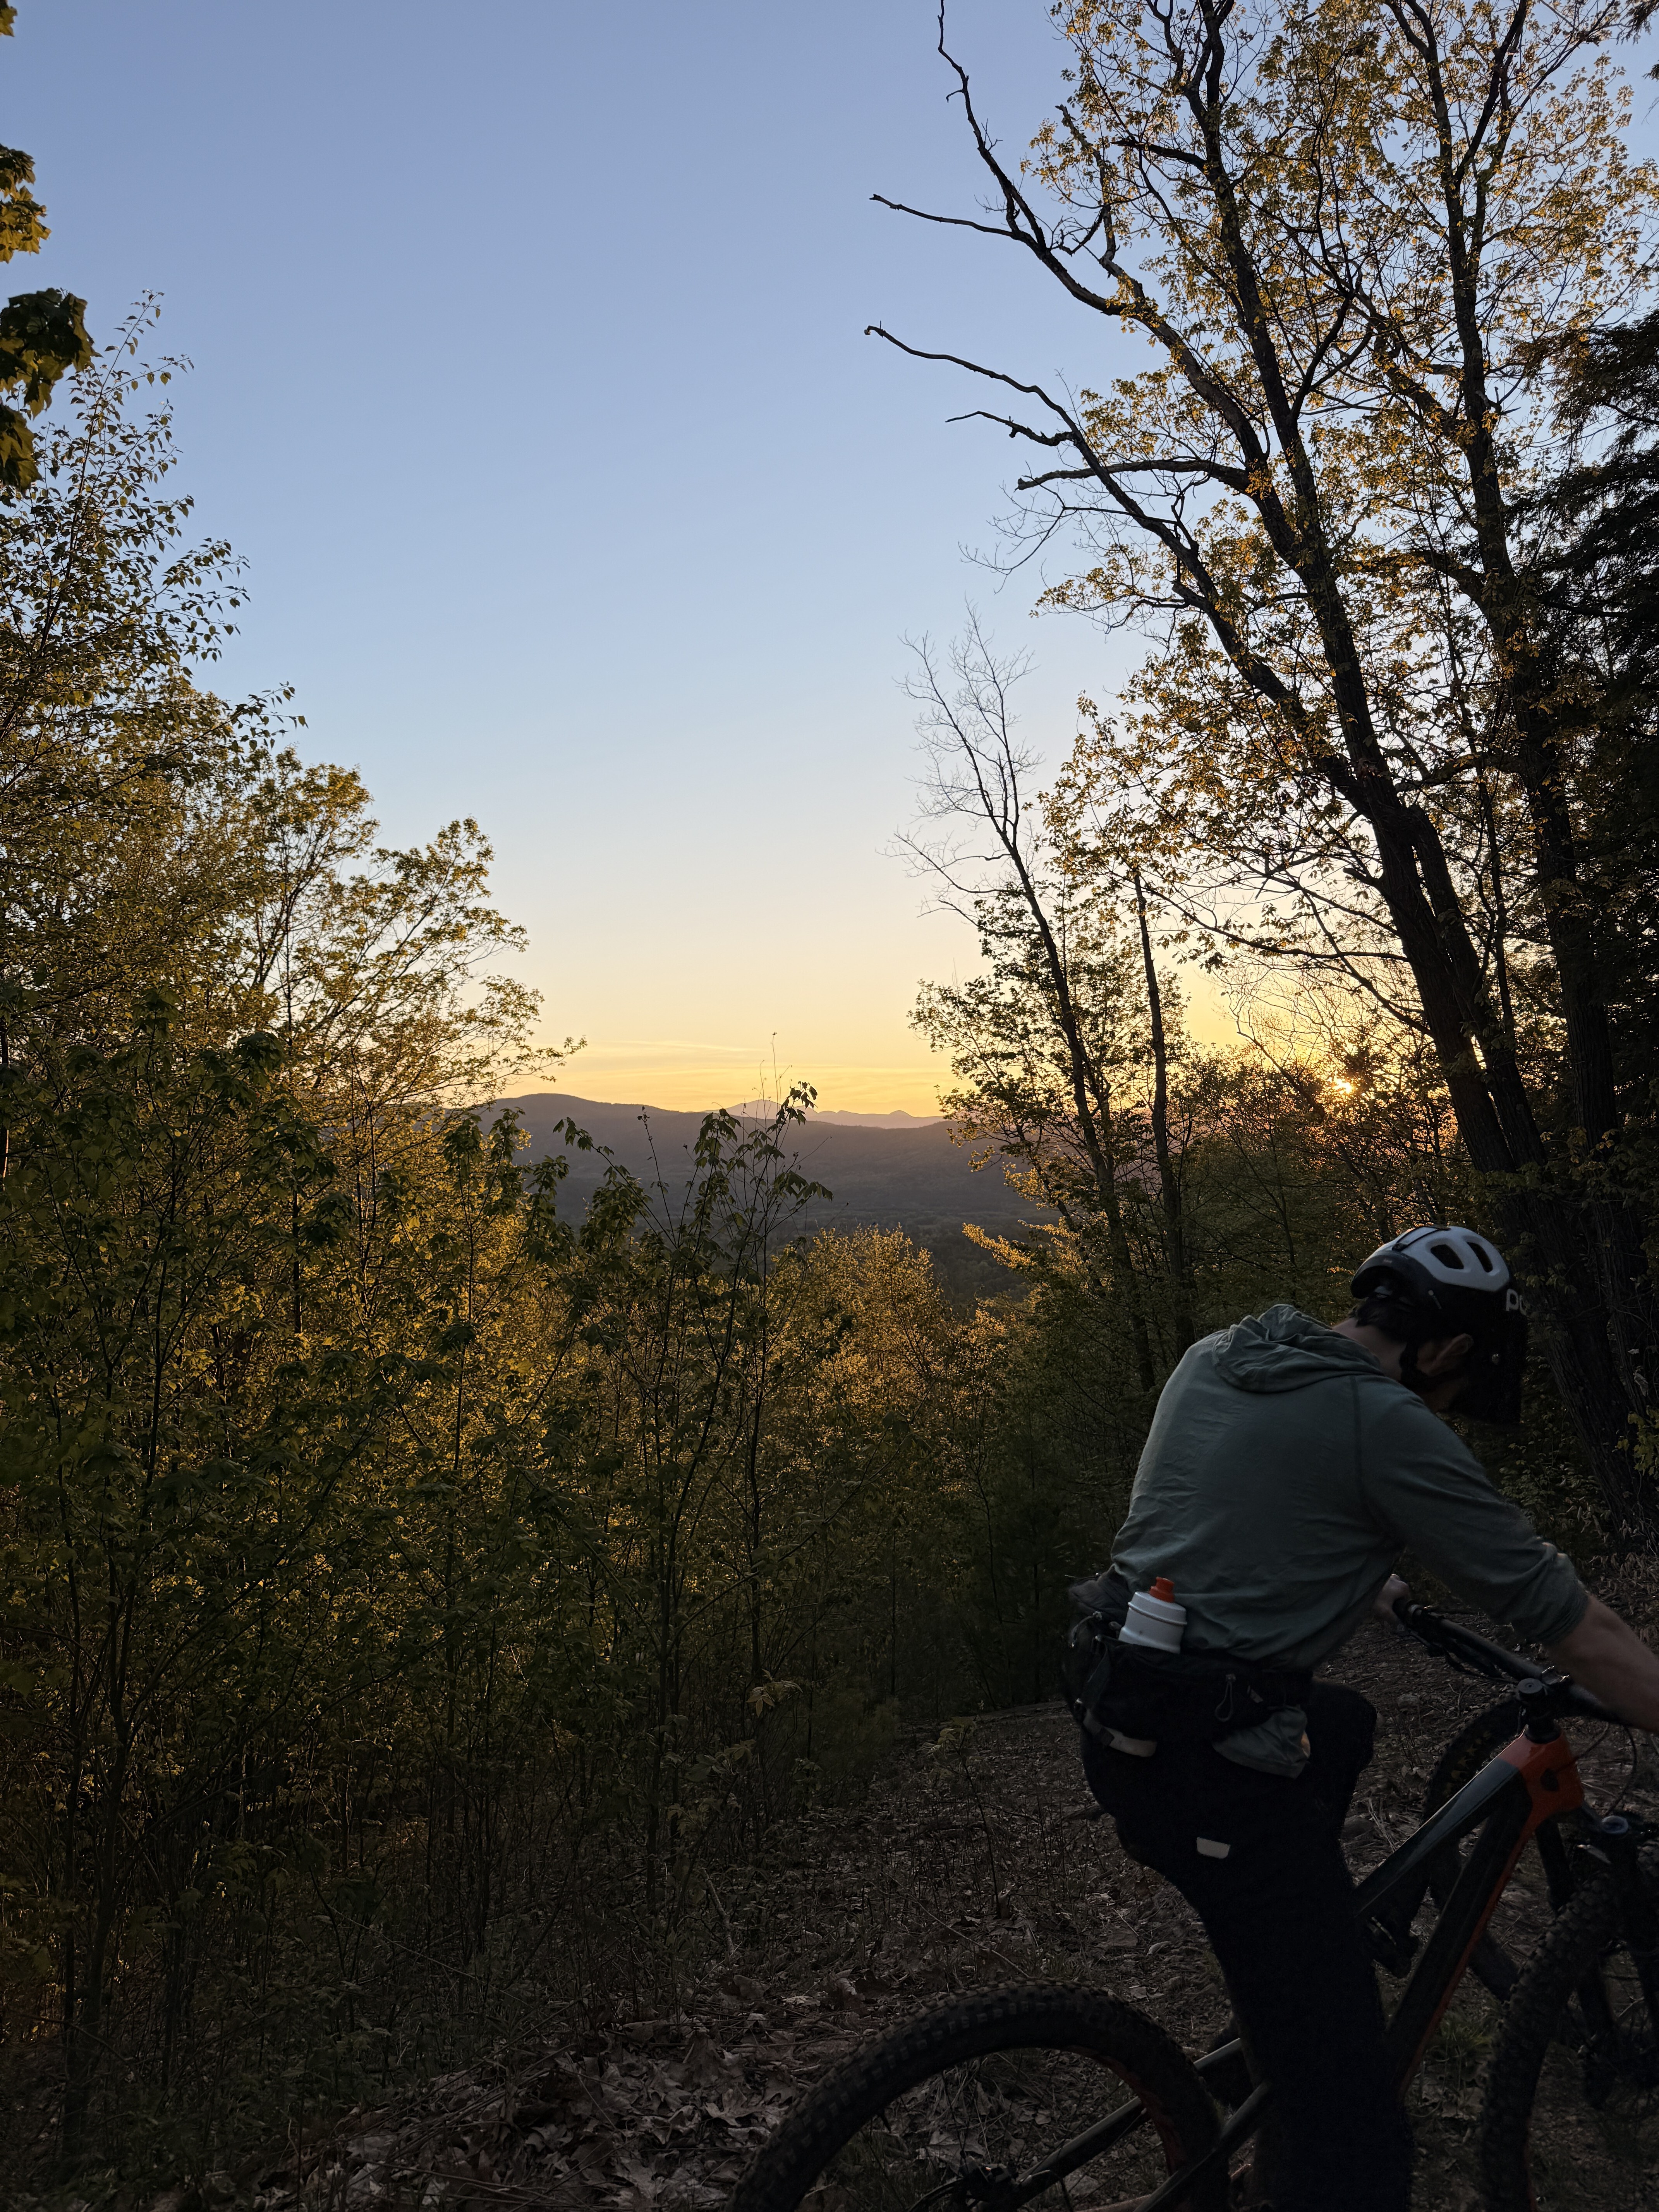
I took sample 02 on an overnight bikepacking trip for a real-world test. I kept it on the entire trip, sweating in the sun, sleeping under cool skies, and the entirety of the second day, which was cool and rainy. This confirmed to me the fabric was all it was said to be - and it didn’t stink when I got home. A true merino miracle.
► The cuffs still stretched out and bagged with the turned hem. One problem left to solve.
 Hoody keeping me comfy |
 Damp rainy day |
Sample 03:
✅ The cuffs finally solved - We moved to a full-blown cuff instead of a turned hem to finish the sleeve. This prevented bagging and stretching out as the original sample did.
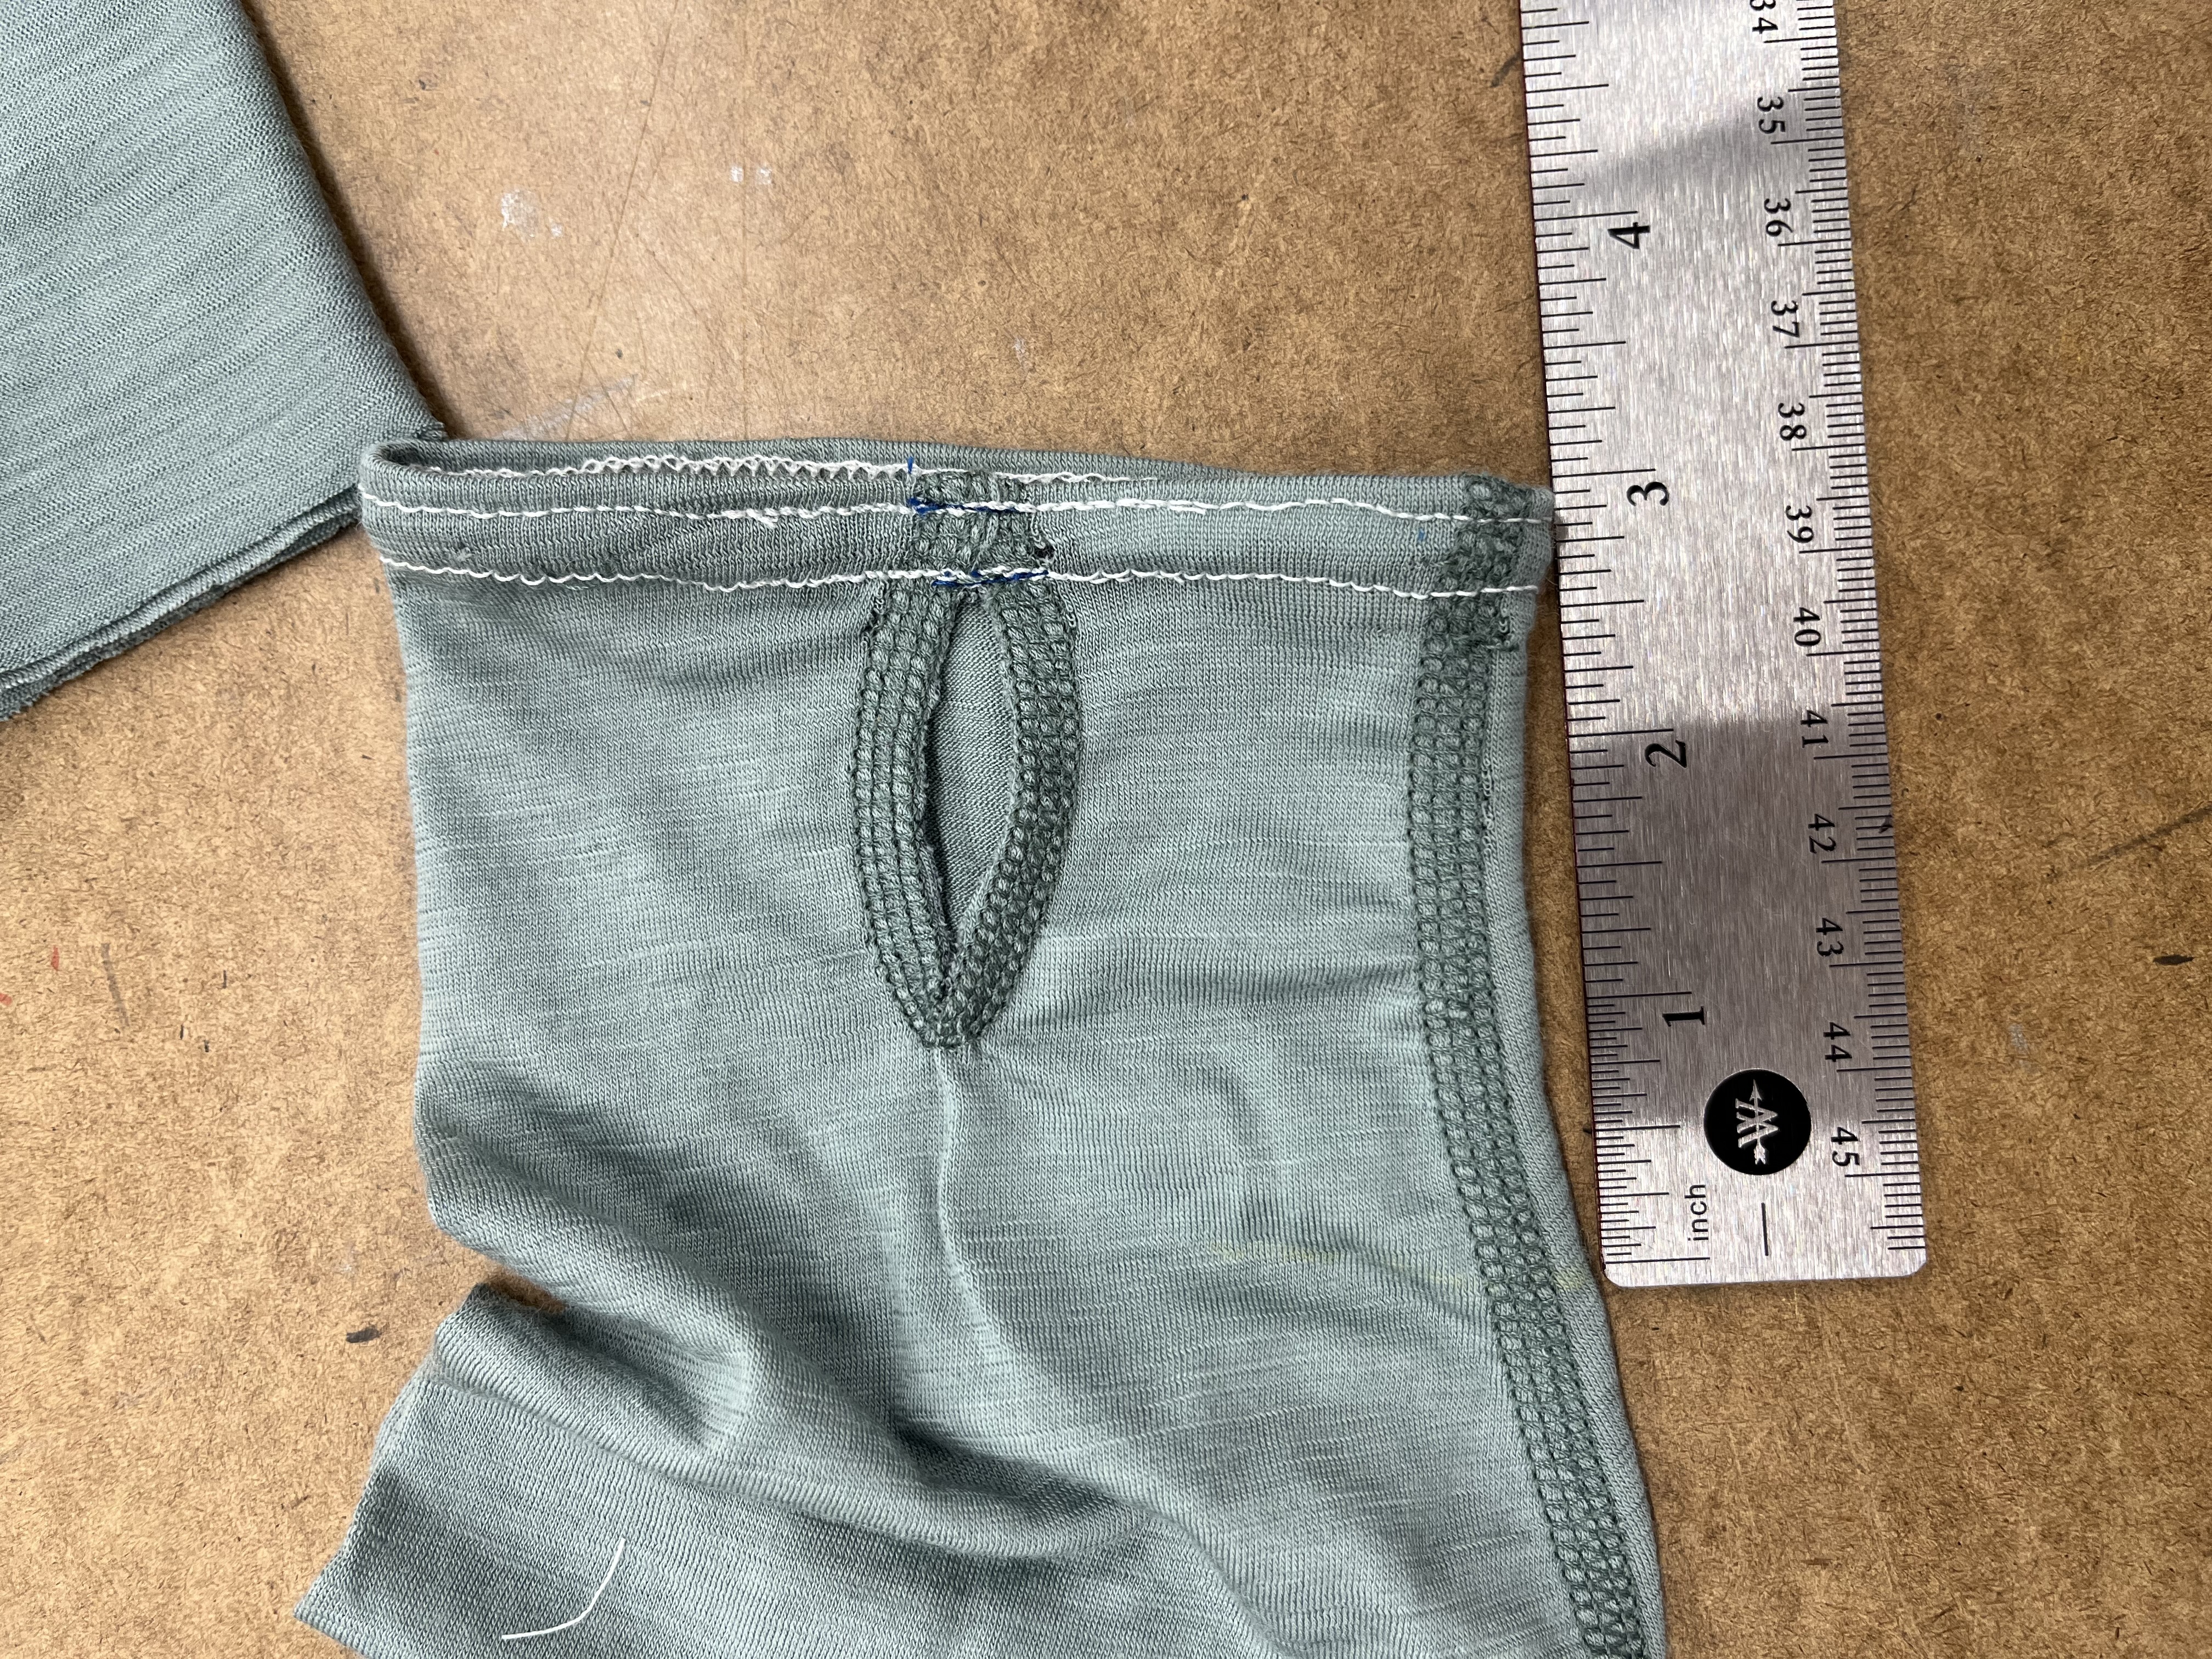 Initial Turned Hem |
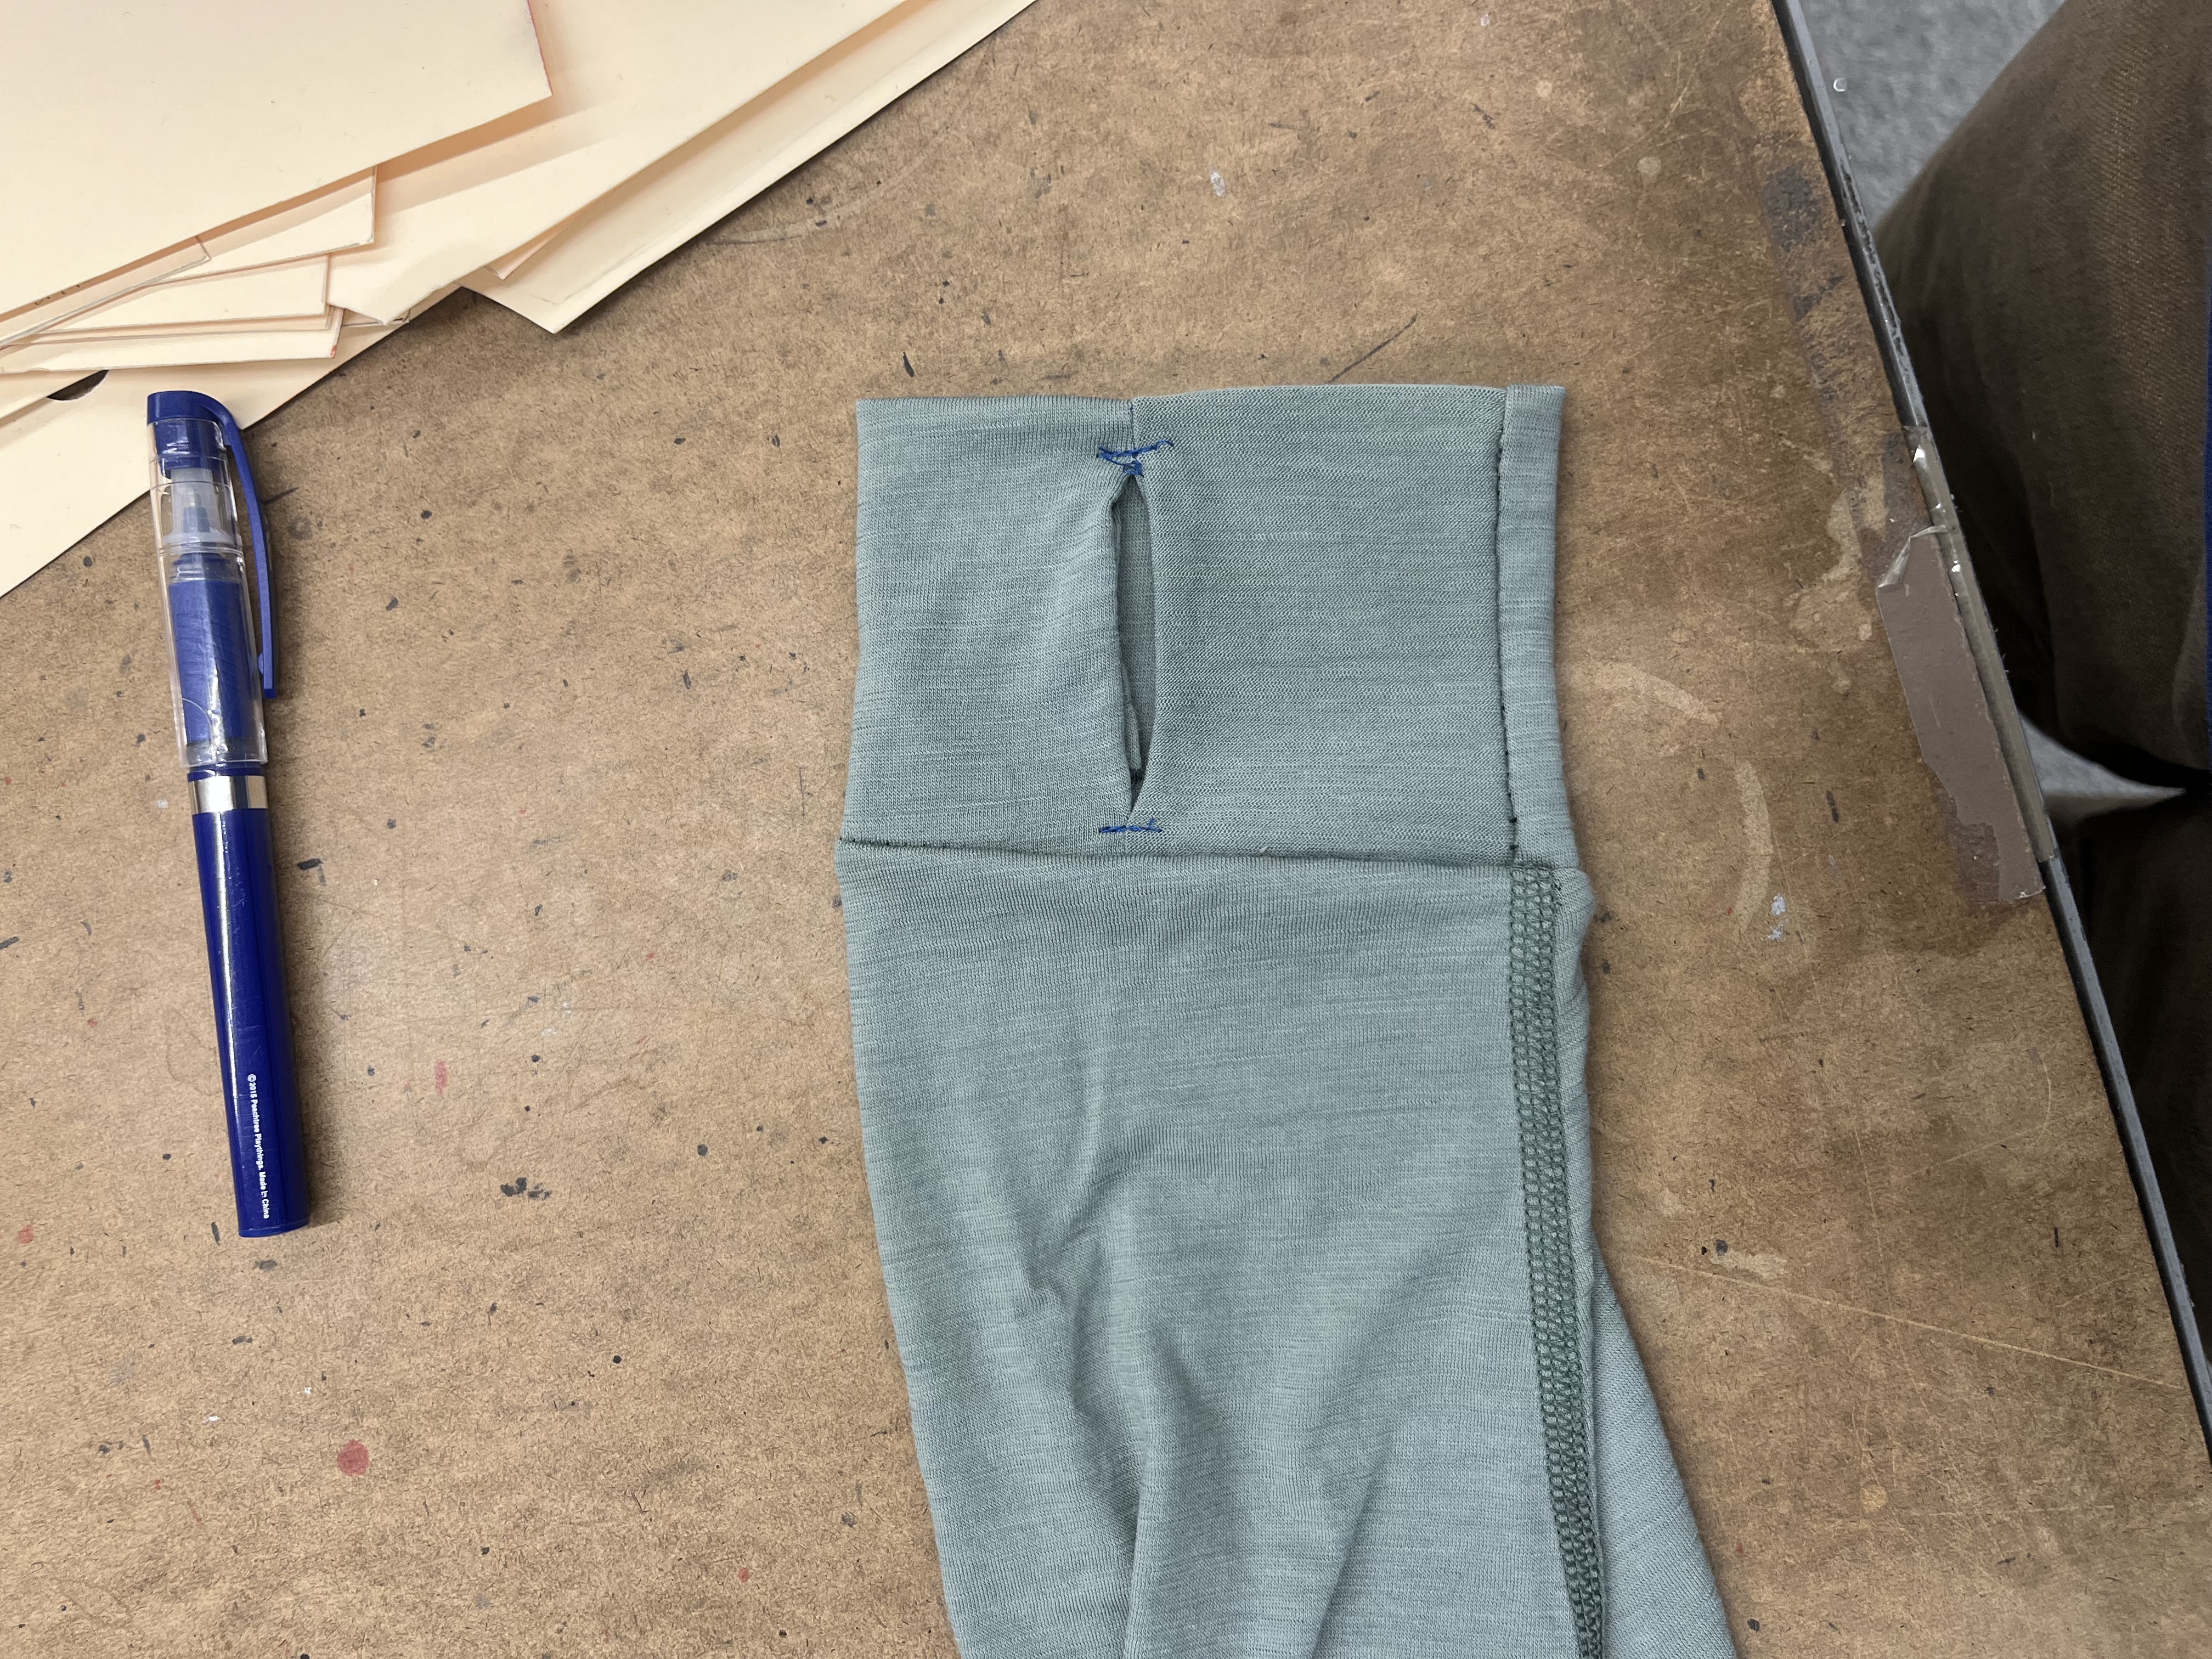 Full Blown Cuff |
Ready for production:
With those problems solved, this bad boy was ready for production: 150 gsm, flatlocked seams, proper cuffs.
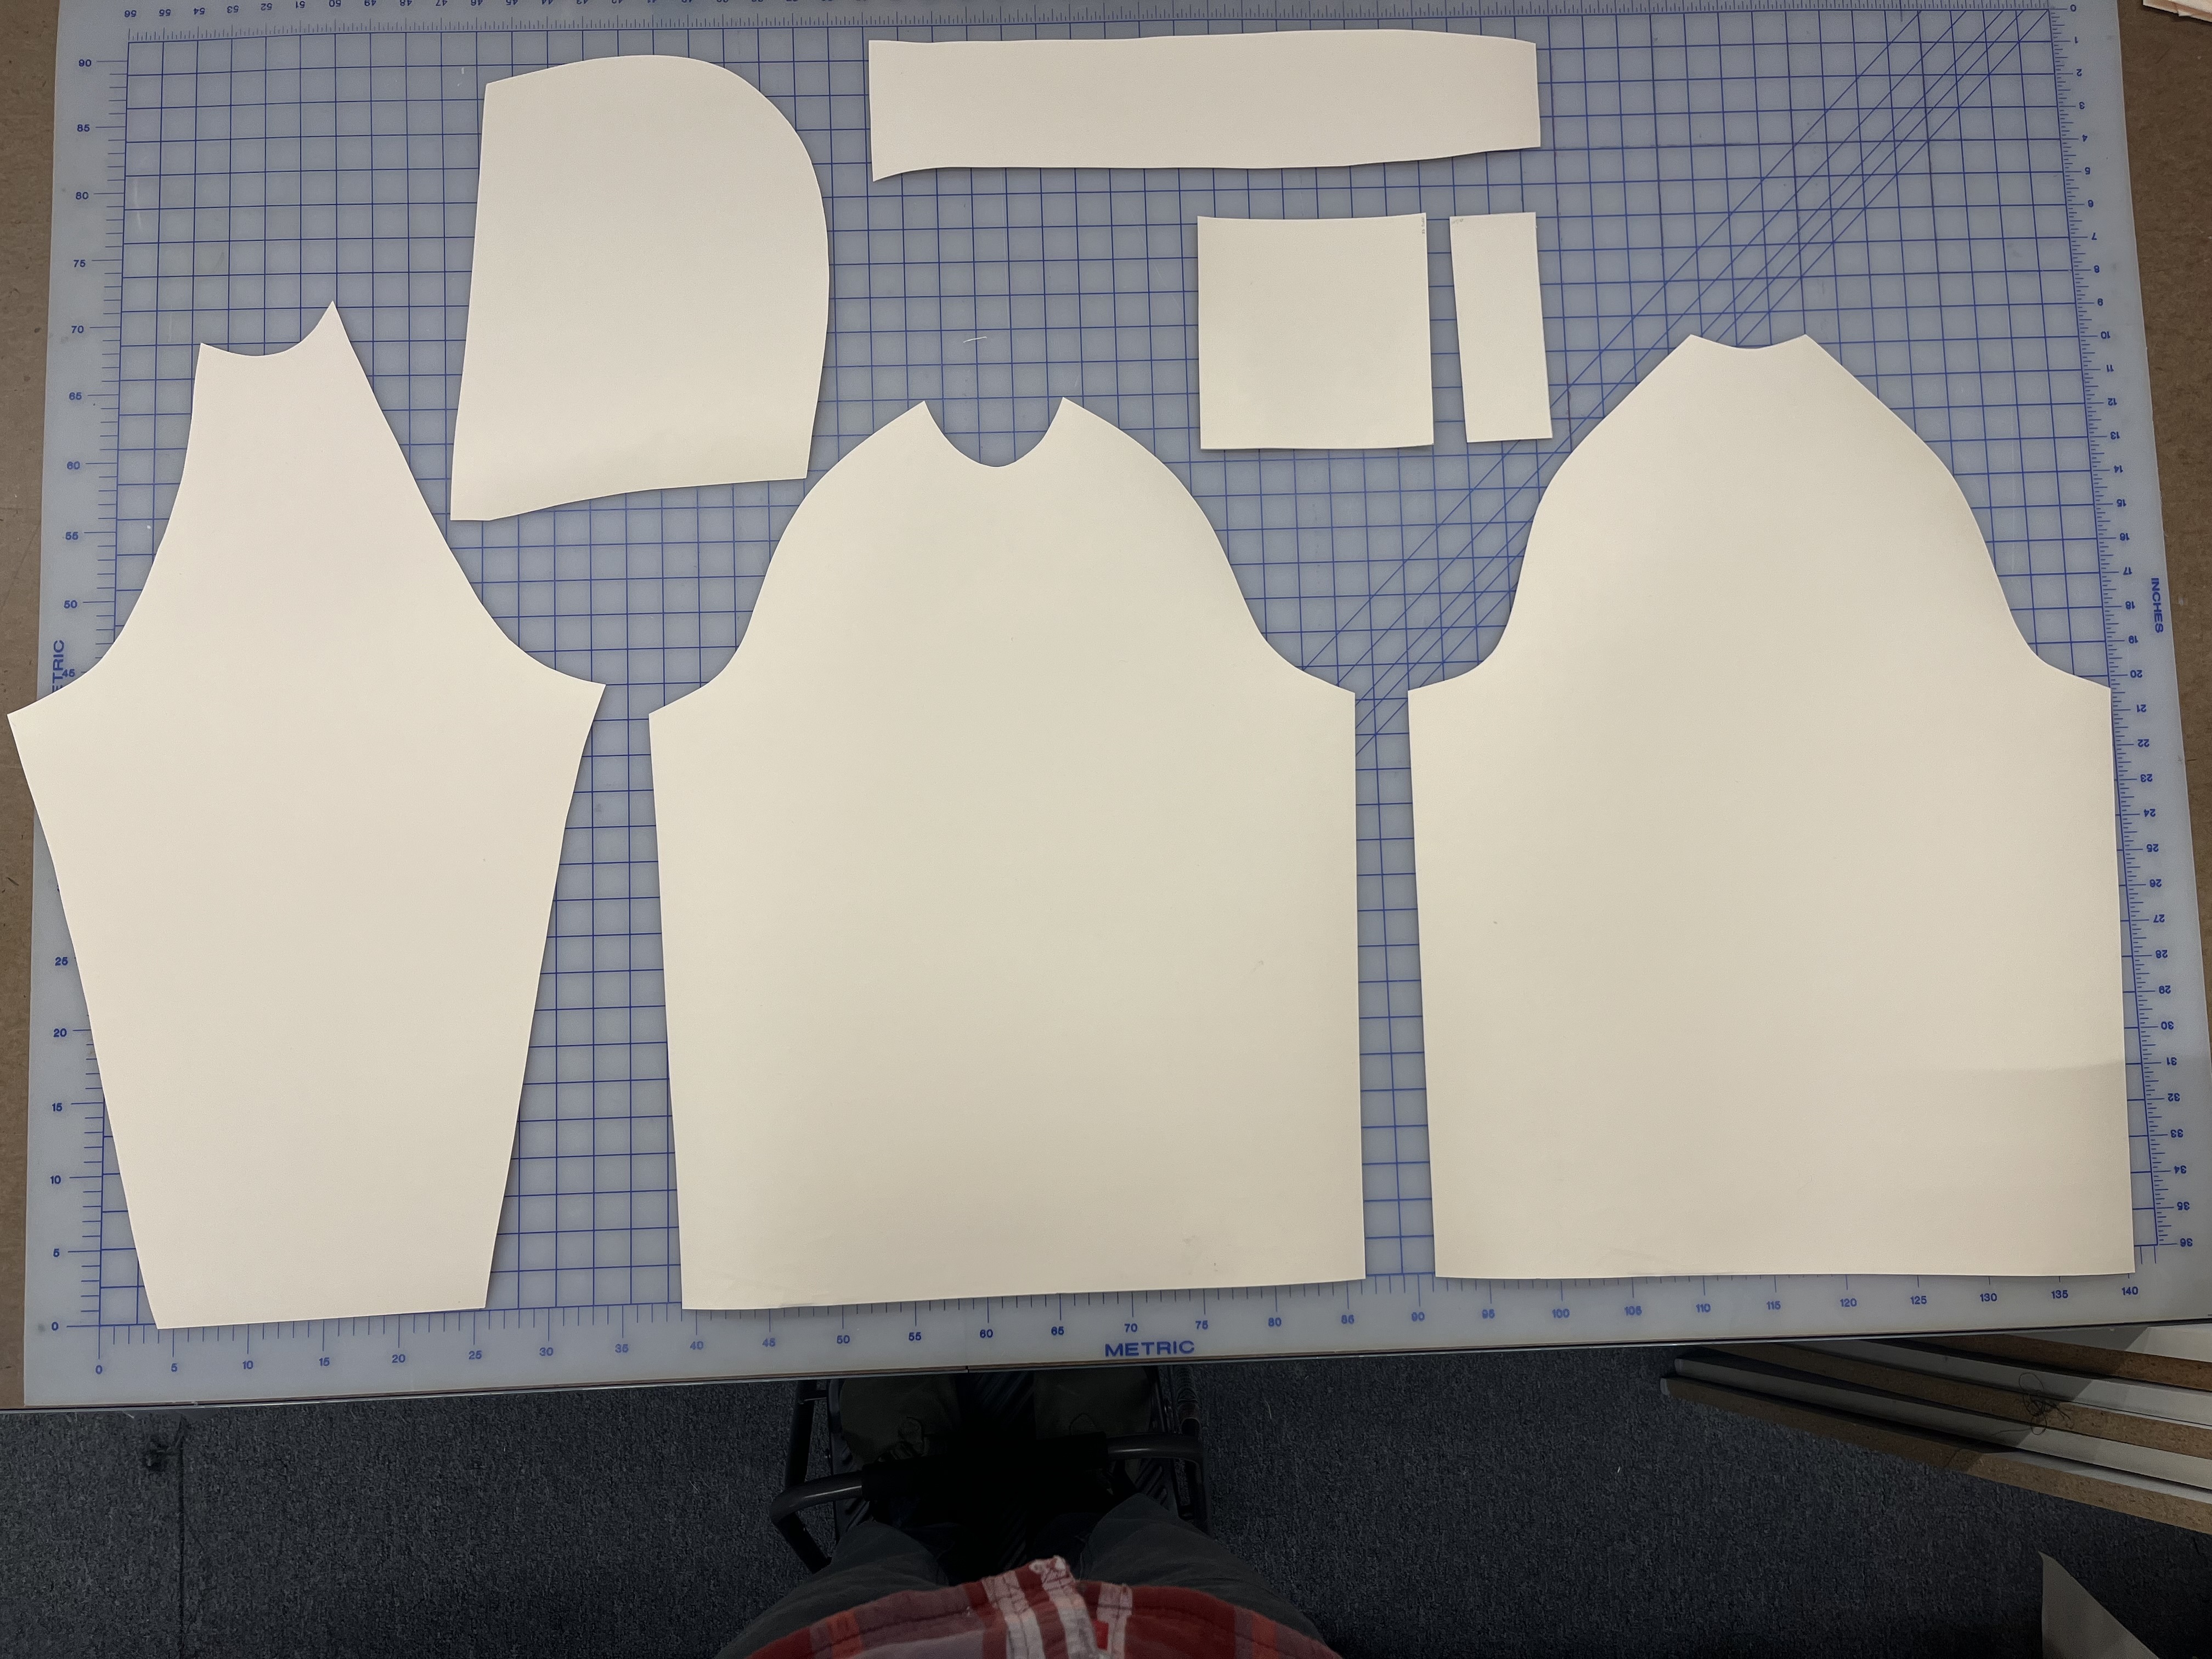
 Merino received |
 Cutting Table |
Every one of those changes came from actually being outside and trying it out. Solving all of the problems that popped up while making this piece was a journey but I'm stoked on how the final hoodie came together. If you're looking for a natural alternative to the classic lightweight polyester hoodie, this could be your solution. I know it's certainly earned a spot in my outdoor clothing systems.